There’s nothing worse than starting your day with a sudden shower hose leak. A leaking shower hose is a common household problem that you can often fix yourself with a few simple tools and a little know-how.
This guide will walk you through everything you need to know, from identifying the cause of the leak to making the repair and even preventing future problems.
Key Takeaways
| Problem | Common Causes | Solution |
| Leaking at the Connection |
|
|
| Hose Burst or Crack |
|
|
| Rust or Scale Buildup |
|
|
Why Is My Shower Hose Leaking?
Before you can fix the leak, it helps to understand why it’s happening. Here are the most common culprits behind a leaking shower hose:
- Loose Connections: Over time, the nuts connecting your shower hose to the showerhead and the water supply can become loose, allowing water to seep out.
- Worn-Out Washers or O-Rings: Inside the hose connections, there are small rubber gaskets or O-rings that create a watertight seal. These can degrade, crack, or become brittle with age, leading to leaks.
- Aging and Damaged Hose: Like anything else, shower hoses don’t last forever. Constant exposure to water, temperature changes, and bending can cause the hose material to crack or split.
- Rust and Scale Buildup: Hard water can cause mineral deposits (scale) and rust to build up at the connection points, preventing a tight seal and leading to leaks.
- High Water Pressure: Excessively high water pressure can put a strain on your shower hose and its connections, causing them to fail over time.
How to Fix a Leaking Shower Hose: A Step-by-Step Guide
Ready to tackle that leak? Here’s how to do it.
Step 1: Identify the Source of the Leak
First, you need to pinpoint exactly where the water is coming from. A leak can occur at three main points:
- The connection to the showerhead
- The connection to the water supply
- A crack or hole in the hose itself
Once you’ve found the source, you can move on to the repair.
Step 2: Gather Your Tools
You won’t need much to fix a leaking shower hose. Here are the tools and materials you should have on hand:
- Adjustable wrench or pliers
- A soft cloth
- Replacement gaskets or O-rings
- A new shower hose (if needed)
- Vinegar or a descaling agent
- A small brush
Step 3: Turn Off the Water Supply
Before you start any repairs, always turn off the water supply to the shower. This will prevent you from getting soaked while you work. You can usually do this by turning the shower valve off completely or by shutting off the main water supply to your home.
Step 4: Fix the Leak
Now, let’s get to the repair. Follow the steps for the type of leak you have:
If the Leak Is at a Connection:
- Tighten the Connection: Use your wrench to gently tighten the nut at the leaking connection. Sometimes, this is all it takes to stop the leak. Be careful not to overtighten, as this can damage the threads.
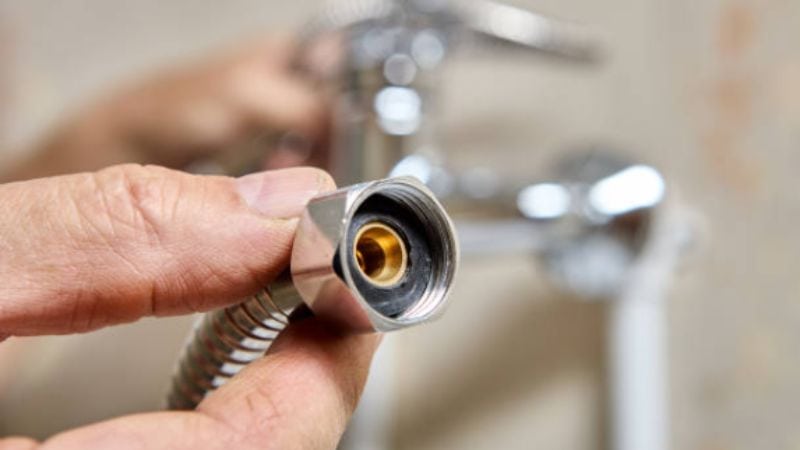
- Inspect the Gasket: If tightening doesn’t work, unscrew the hose from the connection. Inside the nut, you’ll find a rubber gasket. Check it for any signs of damage, like cracks or brittleness.
- Replace the Gasket: If the gasket is damaged, replace it with a new one. This is a cheap and easy fix that solves most connection leaks.
- Clean the Threads: If you see any rust or scale buildup on the threads, soak the connection in vinegar or a descaling agent for about 30 minutes. Then, use a small brush to scrub it clean.
- Reconnect the Hose: Once everything is clean and you have a new gasket in place, reattach the hose and tighten it securely.
If the Leak Is in the Hose Itself:
- Mark the Damage: Find the crack or hole in the hose and mark it with a marker.
- Replace the Hose: Unfortunately, a crack in the hose itself usually can’t be repaired effectively. The best solution is to replace the entire hose. It’s a simple and relatively inexpensive fix that will save you from future headaches.
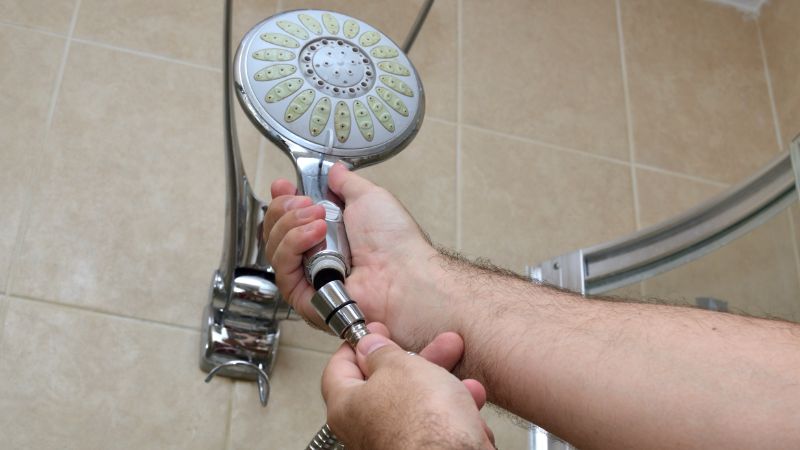
- Install the New Hose: Unscrew the old hose from both the showerhead and the water supply. Then, screw the new hose into place, making sure the connections are tight.
Step 5: Test Your Repair
Once you’ve finished your repair, it’s time to test your work. Turn the water supply back on and run the shower for a few minutes. Carefully inspect the hose and connections for any signs of leaks.
How to Prevent Future Shower Hose Leaks
Now that you’ve fixed your leak, here are a few tips to prevent it from happening again:
- Regular Checks: Periodically inspect your shower hose and connections for any signs of wear or damage.
- Keep It Dry: After you shower, wipe down the hose and connections to prevent rust and scale buildup.
- Choose Quality: When it’s time to replace your shower hose, invest in a high-quality option from a reputable brand like Leelongs. Our hoses are designed for durability and a superior seal, giving you peace of mind.
- Consider a Pressure Regulator: If you have high water pressure, a plumber can install a pressure regulator to reduce the strain on your plumbing fixtures.
When to Call a Professional
While most shower hose leaks are an easy DIY fix, there are times when it’s best to call a professional plumber. If you’ve tried the steps above and the leak persists, or if you’re not comfortable making the repair yourself, don’t hesitate to call for help.
Frequently Asked Questions (FAQ)
1. Can I use waterproof tape to fix a leaking shower hose?
While you can use waterproof tape as a temporary fix, it’s not a long-term solution. It’s best to address the root cause of the leak to prevent further damage.
2. How often should I replace my shower hose?
There’s no set timeline, but it’s a good idea to inspect your hose regularly and replace it if you see any signs of wear, such as cracks, kinks, or rust.
3. Why is my new shower hose leaking?
If your new shower hose is leaking, it’s likely due to an improper installation. Make sure the connections are tight and that the gaskets are properly seated.
With these simple tips, you can easily tackle a leaking shower hose and get back to enjoying your daily shower. Give it a try.


